
In this tutorial i will introduce you with a color isolation technique used in photoshop to do some sort of amazing thing with the pictures.Okay by not wasting more time let's get into the tutorial...
Color Isolation For Beginners
The idea of this tutorial is to add a color isolation in pictures.This is mostly for beginners and it deals with vector masking.This was done using Photoshop CS but if you have version 7 or 6 this few steps will be really easy to follow. Pick a picture you want to manipulate, or use this same one..
1) First we have to duplicate the layer and Desaturate on of them is the Shift+Control+U keys.
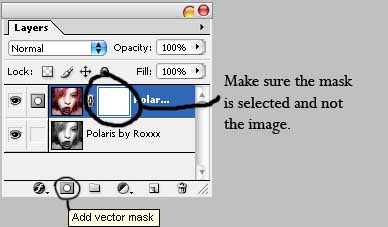
2) So now we have 2 layers : One with color and the other without.Select the colored layer and add a vector mask to it . Ok . When working with masks, you must know that the only colors used are black and whyte. Black erases while whyte paints. In that case you can also use different shades of gray for different opacities.
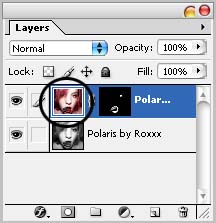
3) Lets use a solid round edge brush and paint with black all the picture exept the lips and the eyes.You should get this result.
*Its Important to use a solid edged brush or else we will get different opacities.

4) Lets make the lips and eye brighter.Select the image thumbnail in the layers box.Then select the Dodge Tool, and use it on the lips. Don't use it too much tho .. or else the colors will get all messed up. So now you should get this result!

5) Now its time to blur the whole thing up!Select the Blur Tool and use it on both layers.Use it as much as u want to get the desired look you're looking for.
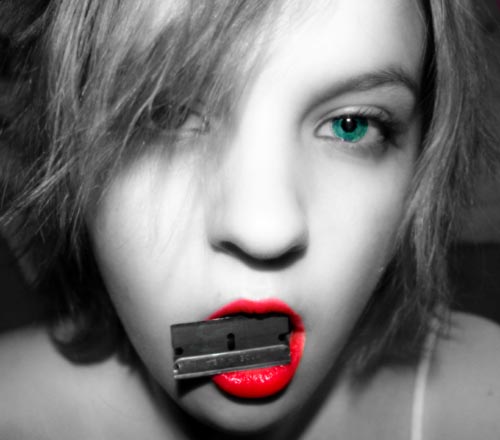
And here you go! I hope this tutorial will help you in future projects!!
0 comments:
Post a Comment