Showing posts with label Blogger Stuff. Show all posts

30 July 2016

// // Leave a Comment

How To Integrate Blogspot, Disqus And Facebook Comment Tabs On Blogger?


There is a debatable topic on selecting comment box for blogger blog, there are numbers of comment platform available on for blogger user like Disqus, Facebook, Livefyre, and so on. There is a positive and negative points of individual comment platform, If we want to gain the all advantages of each comment system than we have to add multiple comment system in our blogger blog. Today i am here bring the plugins that will helps you to integrate major comment like blogger, facebook and Disqus. I had visited one WordPress based blog which having all three integrated comment system, based on that idea i had develop this plugins i hope you will enjoy this.

Integrate Facebook, Disqus and Blogger Comment Together on Blogspot Blog.


Before proceeding you have your disqus username and Facebook App Id.

Now i had assumed that you had your own disqus account username and Facebook App Id, So Now lets start the tutorial.

Step 1: Login in blogger Account. And select Your Blog.


Step 2: Backup Your Blogger Blog. (Learn how to backup Blogger Blog)


Step 3: Navigate Blogger Dashboard > Go to Template > Edit HTML.


Step 4: Find Following Code by pressing CTRL + F.

</head>


Step 5: Just Above </head> tag paste below code.

<meta content='the.vip' property='fb:admins'/>

<meta content='3840756250xxxxx' property='fb:app_id'/>

<script src='http://code.jquery.com/jquery-latest.pack.js'/>

<script src='http://viptechfiles.somee.com/vtwcommentstyle.js'/>

<script src='http://connect.facebook.net/en_US/all.js#xfbml=1'/>

Note:

Replace the.vip with with your own personal facebook username.

replce 3840756250xxxxx with your own facebook App Id.


Step 6:
Now search for below code.

<div class='comments' id='comments'>

Note:If you find multiple code than paste below code under each "<div class='comments' id='comments'>" code

Step 7:

Use Below Integrated Facbook, disqus and blogger tab generator, Copy and Paste Generated Code Just After <div class='comments' id='comments'> code.


Step 8: Now we need to add disqus script to show no. of comment on button for it, find below code.

</body>

Step 9: Paste Following code just above </body> tag.

<script type='text/javascript'>

/* * * CONFIGURATION VARIABLES: EDIT BEFORE PASTING INTO YOUR WEBPAGE * * */

var disqus_shortname = &#39;Disqus-Site-Name&#39;; // required: replace example with your forum shortname

/* * * DON&#39;T EDIT BELOW THIS LINE * * */

(function () {

var s = document.createElement(&#39;script&#39;); s.async = true;

s.type = &#39;text/javascript&#39;;

s.src = &#39;//&#39; + disqus_shortname + &#39;.disqus.com/count.js&#39;;

(document.getElementsByTagName(&#39;HEAD&#39;)[0] || document.getElementsByTagName(&#39;BODY&#39;)[0]).appendChild(s);

}());

</script>

Replace Green Highlighted Disqus-Site-Name with your own disqus site username.

Step 10: Save Your Template, that set.

Note: If you find any trouble regarding appearance of 3 comment box, kindly change the comment setting as per instruction. Go to Setting > Post and Comment > In field of comment location select option "Embedded or Full Page" and check it respectively..

Credit link:

We have added a Credit attribution link is this gadget, Please it a humble request you all to do not remove it. No doubt, it is completely free for you all but, we also need your corporation to spread this widget to other who need it so please support us.

Final Words

Here in this widget i had used "onclick" events to disqus comment, it means disqus comment will load only when visitors click on disqus button. So as to it will not take unnecessary loading time. By adding Multiple comment system widget in blogger blog , Visitors have more space to share their thoughts, view, suggestions or query due to multiple logins facilities available to them. Share your point of view should we add multiple comment box to blogger blog or not?
Read More
// // Leave a Comment

Free Blogging Apps For Offline Blogging

As an offline weblog client, BlogDesk lets you comfortably write and effortlessly publish new entries to your blog.

No need to use those annoying HTML Tags in the WYSIWYG editor. Images can be directly inserted and are automatically uploaded. Even publishing simultaneously to multiple blogs is a matter of a click.

Blogging from your desktop is significantly easier if you manage multiple blogs, write for others, or want to compose your posts locally. A desktop app can offer added security, reliability and organization of your entire body of work, which is a necessity if you are a prolific writer or love to collect snippets and articles from around the web. This list offers a look at some of the best free tools for blog writing and management in Windows based on usability and features.

Windows Live Editor

Click on headings for download & view more detail about Apps. Keep up to date with new features and opportunities by subscribing to this blog via email Notification, or like us our page on facebook. Thanks for reading our posts and don't forget to comment. Till then Happy Blogging!!
Read More

04 June 2016

// // Leave a Comment

Best Responsive Blogger Template : COPmo


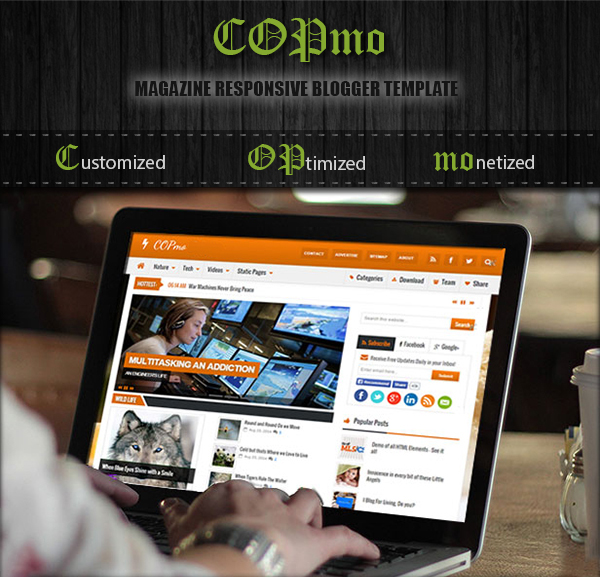
COPmo is the first multi purpose responsive BlogSpot template that offers unlimited color schemes, RTL layouts, SEO support and tons of widgets.

COPmo responsive blogger template

After 5 years of waiting we have finally decided to release our premium blogger templates, plugins and widgets. Internet is flooded today with blogger templates but what is missing is a clean code, SEO friendly layout and a robust XHTML structure that could meet search engines' ranking criteria. To fill these missing gems, STCnetwork's team of professional developers and SEO consultants have stepped ahead to take blogger to the next level. Presenting our first multipurpose template for blogspot blogging platform, entitled as "COPmo"

Introducing COPmo

COPmo stands for "Customized, Optimized and Monetized by default".

It is the simplest definition for a fully functional, code extendable and dynamic theme that is both user friendly and SEO friendly. COPmo is the first advanced magazine responsive BlogSpot template that offers unlimited color schemes, responsive fluid layouts, easy customization options, SEO support, and tons of widgets & plugins. It is exclusively built for non-techy users, one-click install, simple drag and drop!

COPmo template is best suited for categories such as:

  • Lifestyle,
  • Fashion,
  • News,
  • Technology,
  • Clothing,
  • Movie,
  • eBooks,
  • Games,
  • Diary,
  • Music

Lets see all its features in a unique illustrative way.

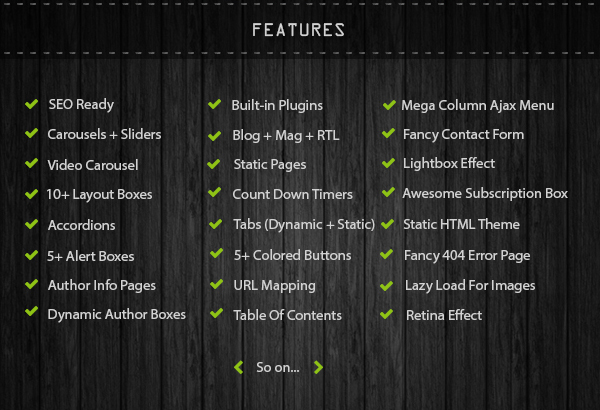
COPmo Features

COPmo is made by default SEO friendly to meet best SEO practices to develop a robust structure that provides a smooth experience to search robots and social media networks. All Important SEO plugins are built-in and extra care is taken to make the core content easy to crawl and index. It meets all important search engine ranking criteria and makes sure you rank well in Google SERPs. Same SEO that is applied to viptechworld blog has been implemented to COPmo.

COPmo magazine responsive blogger template

Tons of premium plugins have already been added inside the layout to make your blogging hobby even more worthwhile. From helping you build Email lists to formatting your posts in a professional way, almost every widget and web element has been included.

COPmo also supports multiple comment plugins be that Facebook, Disqus, Google+ or Blogger default commenting system.

COPmo Features

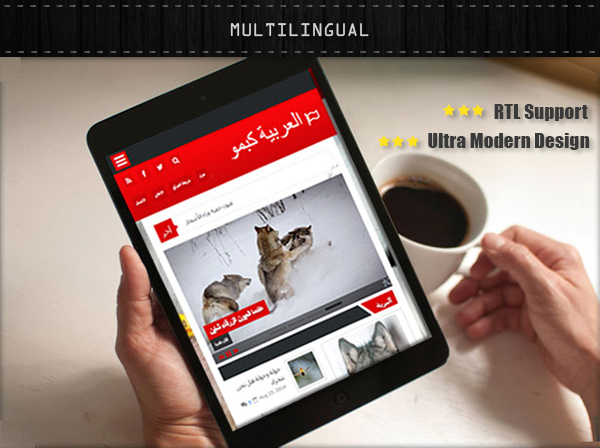
COPmo is a multilingual template which has separate themes for Left-To-Right languages and also for Right-To-Left languages such as Arabic, Hebrew, Urdu, Thaana etc. All international languages are supported, may it be LTR or RTL.

Even the sharing buttons have been changed to the RTL language. The Blogger and Facebook comment systems can also be changed in your local RTL language.

facebook in local language

Multilingual Blogger Template

Download COPmo
Created March 5, 2016
Last Update May 30, 2016
Download Size 3.86MB
High Resolution Yes
Widget Ready Yes
Technology Used XHTML, AJAX, CSS3, HTML5, jQuery, JavaScript
Compatible Browsers IE9, IE10, IE11, Firefox, Safari, Opera, Chrome, Edge
Software Version Google Blogger 1.0
Files Included XML, HTML, CSS, JS, PNG, JPEG
Template Types XML Blogger Template, Static HTML ThemeNEW 
Columns 2
Text Direction LTR, RTL
Category Technology, Diary, Lifestyle, Fashion, Clothing, News, Movie, eBooks, Games, Music
Documentation Well Documented (126 Pages)
Layout Mobile Responsive

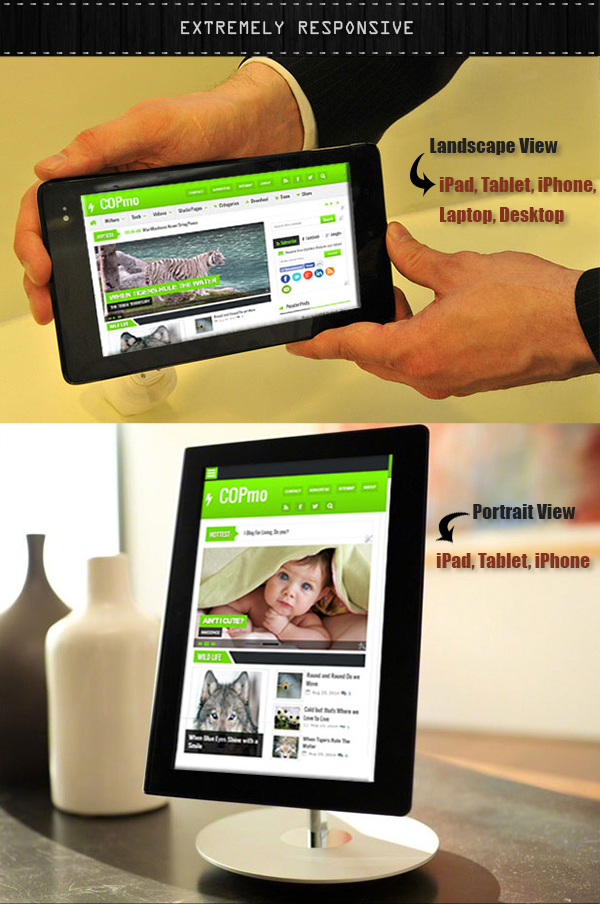
Whether your visitors are iPad lovers or smartphone addicts, COPmo is extremely fluid and flexible in design and adapts just perfectly to all device screen sizes be it a Laptop, Desktop PC, Tablet or a Smartphone.

COPmo is unlike a normal responsive template, it is ultra modern in design which you can experience if you test its responsive behavior in different devices. It is extremely fast loading and loads instantly on mobile devices thanks to the use of Mobile conditional tags unlike display-none which is not a recommended approach. Several breakpoints are used to make sure your design does not crash at all, thus providing an awesome UI experience.

Mobile Responsive Blogger Template -COPmo

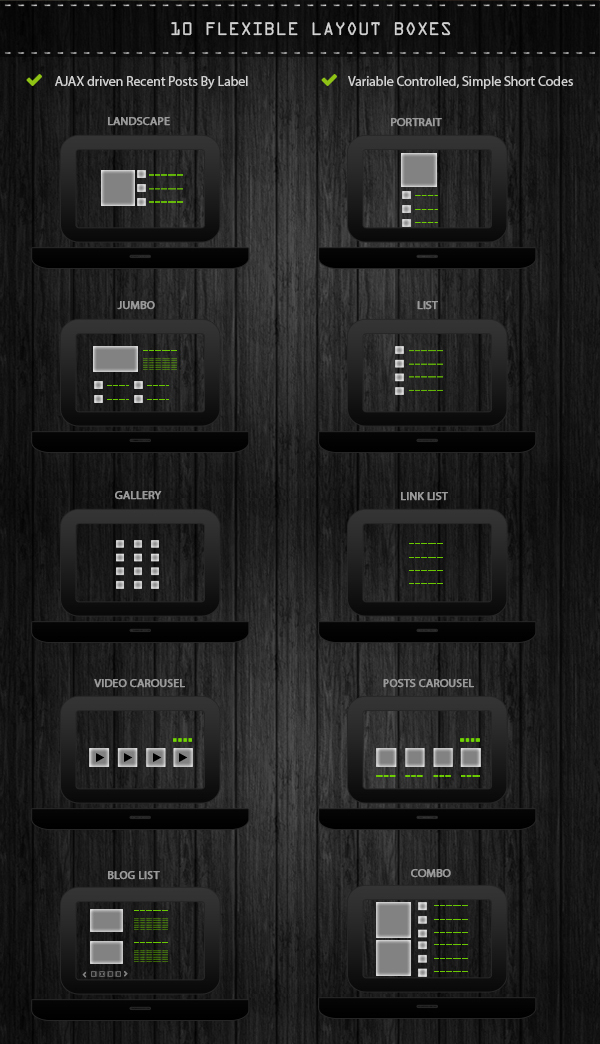
You can display your posts by label/category in different layout boxes. You can choose to display a horizontal list of recent posts on homepage or vertical list. You can display posts inside a carousel, slider or even inside gallery grid. You can display them with thumbnails or without thumbnails. Full options are supported. Every layout box is given a name for simplicity.

For videos, most of our clients asked for a method through which they could display thumbnails for all video network sites not necessarily YouTube. Keeping that in mind we integrated a custom method which will help you easily display thumbnails of your choice for any video iframe you want.

Layout Boxes For Blogspot template - COPmo

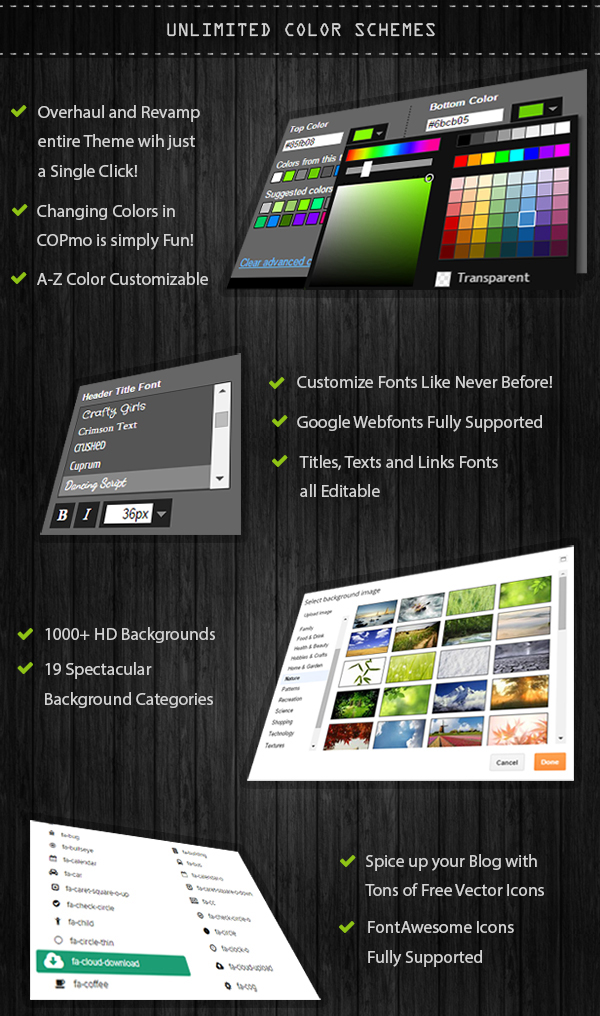
COPmo can easily be customized with a click of a button thanks to the built-in functionality of Blogger Template Designer which works just perfect with this template. You can change fonts and colors through simple checkboxes and drag/drop system. You can add any background you like to your template using template designer.

Furthermore you can also add overlay and patterns to your background to control its darkness or brightness, an option that is rarely seen in blogspot templates i.e. Multi Layered Background. Observe the background difference in demo of COPmo1,2,3.  Everything is automated!

Blogger template with Unlimited Color Schemes

Keeping search engine penalties in mind, all efforts are made to make sure your entire structure offers a smooth crawling experience to search robots and meet all major SE ranking metrics. You can now focus on your content and let COPmo handle the SEO part!

SEO friendly Blogspot template

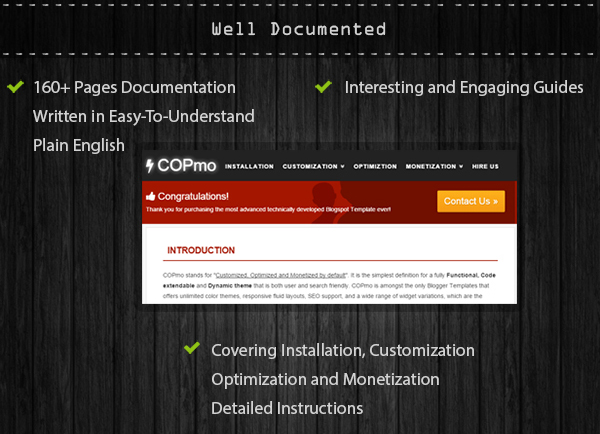
Ever wondered that a blogger template could have a well written guide document of over 160 pages? This shows our dedication towards work and sincerity towards our clients. The document itself is a complete offline website in itself.

The document is written in an interactive way with easy explanation, navigation and engaging guides.  All four important parts of installation, customization, optimization and monetization are covered in detail. You can read it anytime, anywhere!

Blogger Template Documentation

COPmo is coded only for serious bloggers who have a passion to make a lucrative income online and establish their online empire. It's a complete toolkit for people who wish to take their blogging hobby to the next level.

If you liked COPmo, please do not forget to share it with your friends using the social sharing buttons to your left.

Share COPmo Responsive Blogspot Template

Download COPmo

You can pick one or multiple services based on your needs. Click "ADD TO CART" button and then proceed to checkout using the "CHECKOUT" button. We accept payments via PayPal only. Local and international clients will be provided with Bank Account Details upon request. Payments are made via SendOwl's secured and trusted gateway system.

Note: After downloading the template file, extract the compressed contents using WinRAR or WinZIP software.

SERVICES PRICE shopping cart
Blogger XML File + Template File
+ Lifetime Free Consultancy

Details

+ Exclusive Forum Access
+ Template Updates
+ Non-commercial License
$69.00 ADD TO CART
Installation Services + Setup & Installation
+ Customization Support
+ 24/7 Customer Service
+ Whatsapp Instant Help
$99.00 ADD TO CART
SEO services + SEO
+ SMO

Details

+ Template debugging,
+ Dynamic Sitemaps Submission
+ Robots.txt & Meta Tags
+ SEO Plugins Installation
+ AdSense Optimization
+ Fixing Structured Data Errors
+ Settings for URL Parameters
+ Schema Tags Integration
(FB OpenGraph,Twitter Cards,G+ tags)
+ Rich Snippets (star ratings*)
+ Jumbo Share Plugins
+ Sharing buttons Optimization
+ Rectifying your SEO Mistakes
+ Access to 13 Content Writing Secrets
$150.00 ADD TO CART
CHECKOUT

24/7 Customer Service

24/7 customer service We offer lifetime consultancy and online help. Our Clients get free technical help via Whatsapp/Skype/Email/Forum. After purchasing any of our services, we will keep in touch with you for as long as you need us. No extra charges are taken.

If you have any query related to the post above, please feel free to post your comments below. Wishing you all a safe, healthy and successful blogging career!


Read More
// // Leave a Comment

Multi Column Footer Widget For Blogger

Multi-Column-Footer Widget For Blogger

We had previously shared a tutorial on Three Column Footer Widget which was well appreciated and today we have yet another more advanced version of the same widget. This new widget can become three column, four column or with as many columns as you wish. Further this new footer widget has some great CSS effects added to it which makes it even better. First see a demo to know what’s so different about it.

See the widget at the bottom of the following Demo blog,

Live Demo


How To Add the Multi Column Footer Widget To Blogger?

First we will add the CSS code to your blogger templates and then the HTML. So without wasting any time lets jump straight to the steps,

  1. Go To Blogger > Design > Edit HTML
  2. Backup Your Template
  3. Search for ]]></b:skin>
  4. Just above ]]></b:skin> paste the code below,

/*----- VTW MULTI COLUMN FOOTER WIDGET -----*/

#lower {
margin:auto;
padding: 0px 0px 10px 0px;
width: 100%;
background:#333333;
}
#lower-wrapper {
background:#333333;
margin:auto;
padding: 20px 0px 20px 0px;
width: 960px;
border:0;
}
#lowerbar-wrapper {
background:#333333;
float: left;
margin: 0px 5px auto;
padding-bottom: 20px;
width: 23%;
text-align: justify;
color:#ddd;
font: bold 12px Arial, Tahoma, Verdana;
line-height: 1.6em;
word-wrap: break-word;
overflow: hidden;
}
.lowerbar {margin: 0; padding: 0;}
.lowerbar .widget {margin: 0; padding: 10px 20px 0px 20px;}
.lowerbar h2 {
margin: 0px 0px 10px 0px;
padding: 3px 0px 3px 0px;
text-align: left;
border:0;
color:#ddd;
text-transform:uppercase;
font: bold 14px Arial, Tahoma, Verdana;
}
.lowerbar ul {
color:#fff;
margin: 0 auto;
padding: 0;
list-style-type: none;
}
.lowerbar li {
display:block;
color:#fff;
line-height: 1.6em;
margin-left: 0 !important;
padding: 6px;
border-bottom: 1px solid #222;
border-top: 1px solid #444;
list-style-type: none;
}
.lowerbar li a {
text-decoration:none; color: #DBDBDB;
}
.lowerbar li a:hover {
text-decoration:underline;
}
.lowerbar li:hover {
display:block;
background: #222;
}


       5.    Now search for </body> and paste the following code just above </body>


<div id='lower'>
<div id='lower-wrapper'>


<div id='lowerbar-wrapper'>
<b:section class='lowerbar' id='lowerbar1' preferred='yes'>
</b:section>
</div>


<div id='lowerbar-wrapper'>
<b:section class='lowerbar' id='lowerbar2' preferred='yes'>
</b:section>
</div>


<div id='lowerbar-wrapper'>
<b:section class='lowerbar' id='lowerbar3' preferred='yes'>
</b:section>
</div>


<div id='lowerbar-wrapper'>
<b:section class='lowerbar' id='lowerbar4' preferred='yes'>
</b:section>
</div>


<div style='clear: both;'/>
</div> </div>

      6.   Save your template and you are done!

Now go to Page Elements and add your widgets to the newly added Footer Widget that will look something like this,

image

You can observe that there a total of four columns by default and you can add as many widgets as you want to each column. If you wish to increase or decrease the number of vertical columns then follow the steps below.

How to Customize the Widget?

Well I will keep it simple. I think the colors and overall size and padding and margining are just perfect. The only thing that you will need to adjust according to your template is the width of the widget and the number of vertical columns.

1.  In order to reduce or increase the overall width of the widget simply change width: 960px;

2.  If you wish to decrease the number of widgets to three then simply delete this part of the code,

<div id='lowerbar-wrapper'>
<b:section class='lowerbar' id='lowerbar4' preferred='yes'>
</b:section>
</div>

3.  Or if you wish to add an extra column then add the code below just above <div style='clear: both;'/>

<div id='lowerbar-wrapper'>
<b:section class='lowerbar' id='lowerbar#' preferred='yes'>
</b:section>
</div>

Remember that lowerbar# refers to the column number. So if you want to add a fifth column then simply replace  lowerbar# with lowerbar5.

After you have added the fifth column then remember to change width: 23%; with width: 17%; 

You will repeat step 3 for as many columns as you wish to create. But three and four and five columns are a standard. Increasing them will make things look ugly.


That’s it! Enjoy :D

Wishing you all a Happy New Year 2011 full of love, joy and just Happiness. Peace and blessings :)


Read More
// // Leave a Comment

Add A Customized Three Column Footer Widget In Blogger

Three-Column-Footer You might have seen a three column widget at the bottom section of many commercial and professional blogs. Where you can add whatever stuff you like. Take my footer widget as an example. I have added widgets that further keeps the reader busy. This Footer widget contains three columns where each column can accommodate as many widgets as you can add! In order to add such a widget to the bottom section of your blogs and also customize the look and feel of it then lets start learning today’s tutorial.


See a screenshot, Three-Column-Footer-Widget

Add This Three Column Widget Inside Your Blogger Templates

Follow these steps,

  1. Go To Blogger > Layout > Edit HTML
  2. Back Up your template
  3. Search for ]]></b:skin>
  4. Just before ]]></b:skin> paste this CSS code,

/* -----   LOWER SECTION   ----- */
#lower {
       margin:auto;
       padding: 0px 0px 10px 0px;
       width: 100%;
       background:#333434;

#lower-wrapper {
       margin:auto;
       padding: 20px 0px 20px 0px;
       width: 960px;

}

#lowerbar-wrapper {
     border:1px solid #DEDEDE;
      
background:#fff;
       float: left;
       margin: 0px 5px auto;
       padding-bottom: 20px;
       width: 32%;
       text-align: justify;
       font-size:100%;
       line-height: 1.6em;
       word-wrap: break-word; 
       overflow: hidden;
}

       .lowerbar {margin: 0; padding: 0;}
       .lowerbar .widget {margin: 0; padding: 10px 20px 0px 20px;}

.lowerbar h2 {
      margin: 0px 0px 10px 0px;
       padding: 3px 0px 3px 0px;
       text-align: left;
       color:#0084ce;
        text-transform:uppercase;
      font: bold 14px Arial, Tahoma, Verdana;
       border-bottom:3px solid #0084ce;
}

.lowerbar ul {
      margin: 0px 0px 0px 0px;
      padding: 0px 0px 0px 0px;
      list-style-type: none;
}

.lowerbar li {
      margin: 0px 0px 2px 0px;
      padding: 0px 0px 1px 0px;
      border-bottom: 1px dotted #ccc;
}


    5.   Now Search For </body> and just above this code paste the code below,

<div id='lower'>
<div id='lower-wrapper'>
<div id='lowerbar-wrapper'>
<b:section class='lowerbar' id='lowerbar1' preferred='yes'>
</b:section>
</div>
<div id='lowerbar-wrapper'>
<b:section class='lowerbar' id='lowerbar2' preferred='yes'>
</b:section>
</div>
<div id='lowerbar-wrapper'>
<b:section class='lowerbar' id='lowerbar3' preferred='yes'>
</b:section>
</div>
<div style='clear: both;'/>
</div> </div>


6.  Save your template. done!

Now visit the page Layout > Page Elements and start adding widgets! :>>

Customization

You can easily customize the look and colours of the this footer widget. I have bolded the important parts in the CSS code above. Read the descriptions below carefully to better stylize your three column widget. For changing colours use our advanced Colour Code Generator

  • background:#333434;   Changing the six digit colour code will change the background colour of this widget.
  • width: 960px;  This is the width of the widget. If you want you can adjust this width value in accordance with the width of your blog.
  • background:#fff;  and    width: 32%; is the background colour and width of the three columns where the widgets are added.
  • color:#0084ce; This is the Colour of Title Headings
  • font: bold 14px Arial, Tahoma, Verdana;  Edit this to change the font size and family.
  • border-bottom:3px solid #0084ce;   Edit this to change the thickness, style and colour of the border that appears at the bottom of Title Heading
  • border-bottom: 1px dotted #ccc; Editing this will change the size, style and colour of the border that appears below links.

That’s All!

A tutorial on Four Column Footer widget will be posted soon. Till then keep playing with this one :> Do let me know if you needed help. Your questions are more than an honor!


Read More

31 May 2016

// // Leave a Comment

Verticle Floating Share Widget For Blogger Blogs

Sharing is the best method to increase blog traffic so after publishing our blog posts we share them to social media and in return we get a lot of traffic. When our visitors landed on our blog's page and like our post then they thought to say thanks to the the blogger (author) so they do comment on the post but there is one another way by which visitors can say thanks to us i.e. sharing. By this method visitors can share the post to their favourite social media and we get a lot of visitors and pageviews. So, here we are discussing about a great floating sharing widget for blogger which floats vertically with the page. This widget contains all major social media on which your visitors can easily share or like your posts in a click. This widget contains Facebook like and share, google +1, Pinterest Pin buttons. So if you like this widget and wants to add it to your blog just follow the easy steps below.

How to add the new floating share buttons to blogger

  •  Log in to your Blogger account and go to Template > Edit HTML
  •  Search for <html , leave a space and add xmlns:fb=”http://ogp.me/ns/fb#” just after it. The resulting code should lok like this:
<html xmlns:fb=”http://ogp.me/ns/fb#”
If this is already there, you don’t need to do it again.


  •  Search for <data:post.body/>. If you have more than one of it in your template, search for <div class='post-footer-line post-footer-line-1'/>
  •  And just below that paste the following code:


<b:if cond=’data:blog.pageType == &quot;item&quot;’>
<!–Start Floating Share Buttons with Pinterest–>
<style type=’text/css’>
#dc-float {position:fixed; bottom:15%; right:10px; float:left;
-webkit-border-radius: 5px;
-moz-border-radius: 5px;
border-radius: 5px;
border:1px solid #BBBBBB;
background-color:#FFFFFF;
-webkit-box-shadow: #B3B3B3 5px 5px 5px;
-moz-box-shadow: #B3B3B3 5px 5px 5px;
box-shadow: #B3B3B3 5px 5px 5px;
padding:0 0 2px 0;z-index:10;}
#dc-float .sbutton {float:left;clear:both;margin:5px 5px 0 5px;}
.fb_share_count_top {width:48px !important;}
.fb_share_count_top, .fb_share_count_inner {-moz-border-radius:3px;-webkit-border-radius:3px;}
.FBConnectButton_Small, .FBConnectButton_RTL_Small {width:49px !important; -moz-border-radius:3px;-webkit-border-radius:3px;}
.FBConnectButton_Small .FBConnectButton_Text {padding:2px 2px 3px !important;-moz-border-radius:3px;-webkit-border-radius:3px;font-size:8px;}
</style>
<div id=’dc-float’ title=’Share with your friends’>
<div class=’sbutton’ id=’rt’>
<a class=’twitter-share-button’ data-count=’vertical’ href=’http://twitter.com/share’>Tweet</a><script src=’http://platform.twitter.com/widgets.js’ type=’text/javascript’/>
</div>
<div class=’sbutton’ id=’su’>
<script src=’http://www.stumbleupon.com/hostedbadge.php?s=5′/>
</div>
<div class=’sbutton’ id=’digg’ style=’margin-left:3px;width:48px’>
&lt;div id=&quot;fb-root&quot;&gt;&lt;/div&gt;
&lt;script&gt;(function(d, s, id) {
  var js, fjs = d.getElementsByTagName(s)[0];
  if (d.getElementById(id)) return;
  js = d.createElement(s); js.id = id;
  js.src = &quot;//connect.facebook.net/en_US/all.js#xfbml=1&amp;appId=167544263382192&quot;;
  fjs.parentNode.insertBefore(js, fjs);
}(document, &#39;script&#39;, &#39;facebook-jssdk&#39;));&lt;/script&gt;
<div class=’fb-like’ data-layout=’box_count’ data-send=’false’ data-show-faces=’false’ data-width=’48′/>
</div>
<div class=’sbutton’ id=’gplusone’>
<script src=’https://apis.google.com/js/plusone.js’ type=’text/javascript’/>
<g:plusone size=’tall’/>
</div>
<div class=’sbutton’ id=’gb’>
<a class=’pin-it-button’ count-layout=’vertical’ expr:href=’&quot;http://pinterest.com/pin/create/button/?url=&quot; + data:post.url’>Pin It</a>
<a href=’javascript:void(run_pinmarklet())’ style=’margin-left:-46px; width:43px; height:20px; display:inline-block;’/>
<script src=’http://assets.pinterest.com/js/pinit.js’ type=’text/javascript’/>
<script type=’text/javascript’>
function run_pinmarklet() {
var e=document.createElement(&#39;script&#39;);
e.setAttribute(&#39;type&#39;,&#39;text/javascript&#39;);
e.setAttribute(&#39;charset&#39;,&#39;UTF-8&#39;);
e.setAttribute(&#39;src&#39;,&#39;http://assets.pinterest.com/js/pinmarklet.js?r=&#39; + Math.random()*99999999);
document.body.appendChild(e);
}
</script>
</div>
<div class=’fb_button_share’>
&lt;div id=&quot;fb-root&quot;&gt;&lt;/div&gt;
&lt;script&gt;(function(d, s, id) {
var js, fjs = d.getElementsByTagName(s)[0];
if (d.getElementById(id)) return;
js = d.createElement(s); js.id = id;
js.src = &quot;//connect.facebook.net/en_US/all.js#xfbml=1&amp;appId=112973755438933&quot;; // appId must be valid
fjs.parentNode.insertBefore(js, fjs);
}(document, &#39;script&#39;, &#39;facebook-jssdk&#39;));&lt;/script&gt;
&lt;fb:share-button type=&quot;box_count&quot;&gt;
&lt;/fb:share-button&gt;
</div><br/>
<!–End Floating Share Buttons with Pinterest–>
</b:if>


  • Hit the Save Template button and view your blog.
To make the share butons float to the left instead of right, search for this code:
dc-float {position:fixed; bottom:15%; right:10px; float:left;
Replace with this:
dc-float {position:fixed; bottom:15%; left:10px; float:left;

Final Words:

So this is the easy steps to add this professional floating share buttons to your blogger blog. If you have any query or to give your feedback use the comment box. Keep sharing this post with your friends till then Peace, Blessings and Happy Sharing.
Read More

30 May 2016

// // Leave a Comment

Part 5: Create Responsive Navigation Menu

responsive menu for blogger blogs

The biggest hurdle while creating a Fluid layout is to convert your Static header menu into a responsive one. You need to replace your wide desktop menu with an auto-adjusting mobile menu that must match your webpage color theme and should also contain enough room for both your Navigation links and Search Form. It thus can play a two-in-one role. Today we will create a jQuery menu with Toggle effect to slide up and slide down the Link list. The Menu container will also contain a search functionality and will support nesting of as many child lists as you wish to create. It is an advanced Multi-level Drop Down menu with several important features which are:

  1. It is Fully Responsive - will auto adjust to any mobile screen size
  2. It will appear Only in Mobile devices - thanks to isMobileRequest Conditional Tag
  3. It has a Responsive Search Form - Users can now easily navigate through your site
  4. It supports Infinite Nesting - Its nested structure allows you to add infinite sub-menus!
  5. It is Cross-Platform Browser Compatible - Design Supported by all major browsers

We have added the same menu in vtw and all our client sites. You can see a live demo of this great menu in action:

DEMO (You can see the demo by resizing your window size and scrolling to top of this page.)
Tutorial Series

Add This Responsive Menu in Blogspot

Since we write tutorials exclusively for blogger users, therefore non-Blogger users may ignore steps which are specific to Blogspot. Follow these easy steps:

1. Go To Blogger > Template > Backup your template

2. Click Edit HTML

3. Search for <head> and just below it paste the following code:

[code]

<script src='http://ajax.googleapis.com/ajax/libs/jquery/1/jquery.min.js' type='text/javascript'/>
<link href='http://fortawesome.github.io/Font-Awesome/assets/font-awesome/css/font-awesome.css' rel='stylesheet'/>
<link href='http://fonts.googleapis.com/css?family=Oswald' rel='stylesheet' type='text/css'/>

[/code]

Note: The above code includes source links to jQuery library, FontAwesome icons and Oswald Font. If you already using anyone of it then you may avoid adding their respective source links.

4. Next search </head> and just above it paste the following CSS and JavaScript code

<style>
/*-----------Responsive Drop Down Menu by STCnetwork.org --------------*/
.sf-menu a.home:before,#searchnya button:before{position:absolute;font-family:FontAwesome;font-weight:400;font-style:normal;text-decoration:inherit;-webkit-font-smoothing:antialiased}.highlight{background-color:#f09903;color:#1a1308}#searchnya{float:right;width:80%;position:relative;right:0}.siy{bottom:0;left:0;background:none;font-size:19px;color:#fff}#searchnya input{padding:5px 10px;width:75%;margin:5px 0 0;background-color:#FFF;height:21px;box-shadow:1px 2px 4px #A2A2A2 inset;position:relative}#searchnya input,#searchnya button{border:0;-moz-border-radius:1px;-webkit-border-radius:1px;border-radius:1px;display:inline-block;outline:0;font-size:14px;font-family:oswald;color:#BDB5B5;font-weight:400}#searchnya button{background-color:#6FC415;padding:0;width:15%;height:31px;margin-right:5px;cursor:pointer;position:relative;top:0}#searchnya button:hover{background:#76D314}
#navitions{background-color:#242729;border-bottom:0px solid #6FC415;box-shadow:0 1px 9px #666;display:none}#mobilenav{display:none}#nav1{height:40px;position:relative;background:#242729;box-shadow:1px 2px 9px #6FC415}.sf-menu,.sf-menu *{list-style:none;margin:0;padding:0}.sf-menu li{white-space:normal;-moz-transition:background-color .2s;-webkit-transition:background-color .2s;transition:background-color .2s;position:relative}.sf-menu ul{position:absolute;display:none;top:100%;left:0;z-index:99;min-width:12em;padding-top:4px;width:100%}.sf-menu &gt; li{float:left;text-align:left;margin:0 1px}.sf-menu li:hover &gt; ul,.sf-menu li.sfHover &gt; ul{display:block}.sf-menu a{display:block;position:relative;height:40px;line-height:40px;text-decoration:none;zoom:1;color:#FFF;font-size:100%;padding:0 15px; font-family:oswald; -webkit-transition:all .4s ease-in-out; -moz-transition:all .4s ease-in-out; -o-transition:all .4s ease-in-out; -ms-transition:all .4s ease-in-out;transition:all .4s ease-in-out;}.sf-menu &gt; li &gt; a{font-size:105%;font-family:oswald}.sf-menu ul ul{top:0;left:100%}.sf-menu{float:left}.sf-menu a.home{background-color:#A30000;margin-left:4px;text-indent:-9999px;padding:0}.sf-menu li:hover{background:#222}.sf-menu ul li{background-color:#242729}.sf-menu ul li:hover{background-color:#333}.sf-menu ul a{font-weight:400;height:30px;line-height:30px;font-family:oswald,arial}.sf-menu ul ul li{background:#3C3C3C}.sf-menu li:hover &gt; a,.sf-menu li.sfHover,.sf-menu &gt; li &gt; a.current{-moz-transition:none;-webkit-transition:none;transition:none}.sf-arrows .sf-with-ul{padding-right:1em}.sf-arrows .sf-with-ul:after{content:&#39;&#39;;position:absolute;top:50%;right:.75em;margin-top:-3px;height:0;width:0;border:5px solid transparent;border-top-color:#FFF}.sf-arrows &gt; li &gt; .sf-with-ul:focus:after,.sf-arrows &gt; li:hover &gt; .sf-with-ul:after,.sf-arrows &gt; .sfHover &gt; .sf-with-ul:after{border-top-color:#FFF}.sf-arrows ul .sf-with-ul:after{margin-top:-5px;margin-right:-3px;border-color:transparent transparent transparent #FFF}.sf-arrows ul li &gt; .sf-with-ul:focus:after,.sf-arrows ul li:hover &gt; .sf-with-ul:after,.sf-arrows ul .sfHover &gt; .sf-with-ul:after{border-left-color:#FFF}.sf-menu li &gt; i{position:absolute;top:15px;right:15px;width:27px;height:22px;cursor:pointer;display:none;background-color:#6FC415;-moz-border-radius:2px;-webkit-border-radius:2px;border-radius:2px;outline:0;font:12px Verdana,Geneva,sans-serif}.sf-menu li &gt; i:after{content:&#39;+&#39;;color:#FFF;font-size:19px;position:absolute;left:5px;top:-2px}.sf-menu li ul li i:after{left:3px;font-size: 16px;top: -1px;} .sf-menu li ul li i.active:after  {left: 4px;font-size: 26px;top: -8px;}
.sf-menu li &gt; ul li i{border-radius:100px;-webkit-border-radius:100px;-moz-border-radius:100px; width:20px; height:20px;}
.sf-menu li &gt; i.active:after{content:&#39;-&#39;;font-size:36px;top:-14px}.sf-menu a.home{position:relative}.sf-menu a.home:before{position:absolute;font-family:FontAwesome;font-weight:400;font-style:normal;text-decoration:inherit;-webkit-font-smoothing:antialiased;height:30px;top:0;font-size:27px;left:9px}.sf-menu a.home:before,#view a:before{text-indent:0}html {-webkit-text-size-adjust: 100%;}
@media only screen and (max-width:320px){#searchnya input{width:67%}}
@media only screen and (max-width:768px) {
#navitions{display:block}#nav1{width:100%}#mobilenav{display:block;text-indent:-9999px;width:35px;top:4px;left:10px;position:absolute;height:32px;outline:0;background-color:#6FC415;-moz-border-radius:2px;-webkit-border-radius:2px;border-radius:2px;color:#FFF;text-decoration:none}#mobilenav.active{color:#fff}#mobilenav:before{content:&quot;\f0c9&quot;;top:3px;text-indent:0;left:7px;font-size:26px}#menunav{float:none;display:none;position:absolute;top:45px;left:10px;right:10px;z-index:99999999;background-color:#242729;padding:5px 10px}#menunav li{float:none;margin:0}#menunav &gt; li{margin:1px 0}.sf-menu a.home,.sf-menu a{text-indent:0;margin-left:0;-moz-border-radius:2px;-webkit-border-radius:2px;border-radius:2px;background-color:#1D1D1D!important;padding:5px 20px;border:0}.sf-menu a:hover{background-color:#2c2c2c!important}.sf-menu ul{position:static;padding-top:0}.sf-menu ul a{padding-left:30px}.sf-menu ul ul li a{padding-left:50px; }.sf-menu ul ul ul li a{padding-left:60px; }.sf-menu a.home,.sf-menu li:hover &gt; a.home,.sf-menu &gt; li &gt; a.current{color:#FFF;background-color:#cd2122}.sf-menu ul a:hover{padding-left:40px}.sf-menu ul ul a:hover{padding-left:60px}.sf-menu a.home:before,.sf-menu li:hover &gt; ul,.sf-menu li.sfHover &gt; ul{display:none}.sf-menu ul li,.sf-menu ul ul li,.sf-menu li:hover &gt; a,.sf-menu li.sfHover{background-color:transparent}.sf-menu a.home:before,#mbt-search-layout button:before,#mobilenav:before{position:absolute;font-family:FontAwesome;font-weight:400;font-style:normal;text-decoration:inherit}
}
</style>

<script type='text/javascript'>
//<![CDATA[
// Superfish v1.7.2 - jQuery menu widget - Joel Brich
(function(b){var a=(function(){var p={bcClass:"sf-breadcrumb",menuClass:"sf-js-enabled",anchorClass:"sf-with-ul",menuArrowClass:"sf-arrows"},f=/iPhone|iPad|iPod/i.test(navigator.userAgent),k=(function(){var c=document.documentElement.style;return("behavior" in c&&"fill" in c&&/iemobile/i.test(navigator.userAgent))})(),d=(function(){if(f){b(window).load(function(){b("body").children().on("click",b.noop)})}})(),m=function(s,t){var c=p.menuClass;if(t.cssArrows){c+=" "+p.menuArrowClass}s.toggleClass(c)},r=function(c,s){return c.find("li."+s.pathClass).slice(0,s.pathLevels).addClass(s.hoverClass+" "+p.bcClass).filter(function(){return(b(this).children("ul").hide().show().length)}).removeClass(s.pathClass)},n=function(c){c.children("a").toggleClass(p.anchorClass)},g=function(c){var s=c.css("ms-touch-action");s=(s==="pan-y")?"auto":"pan-y";c.css("ms-touch-action",s)},j=function(t,u){var c="li:has(ul)";if(b.fn.hoverIntent&&!u.disableHI){t.hoverIntent(l,h,c)}else{t.on("mouseenter.superfish",c,l).on("mouseleave.superfish",c,h)}var s="MSPointerDown.superfish";if(!f){s+=" touchend.superfish"}if(k){s+=" mousedown.superfish"}t.on("focusin.superfish","li",l).on("focusout.superfish","li",h).on(s,"a",i)},i=function(t){var s=b(this),c=s.siblings("ul");if(c.length>0&&c.is(":hidden")){s.one("click.superfish",false);if(t.type==="MSPointerDown"){s.trigger("focus")}else{b.proxy(l,s.parent("li"))()}}},l=function(){var c=b(this),s=o(c);clearTimeout(s.sfTimer);c.siblings().superfish("hide").end().superfish("show")},h=function(){var c=b(this),s=o(c);if(f){b.proxy(q,c,s)()}else{clearTimeout(s.sfTimer);s.sfTimer=setTimeout(b.proxy(q,c,s),s.delay)}},q=function(c){c.retainPath=(b.inArray(this[0],c.$path)>-1);this.superfish("hide");if(!this.parents("."+c.hoverClass).length){c.onIdle.call(e(this));if(c.$path.length){b.proxy(l,c.$path)()}}},e=function(c){return c.closest("."+p.menuClass)},o=function(c){return e(c).data("sf-options")};return{hide:function(s){if(this.length){var v=this,w=o(v);if(!w){return this}var t=(w.retainPath===true)?w.$path:"",c=v.find("li."+w.hoverClass).add(this).not(t).removeClass(w.hoverClass).children("ul"),u=w.speedOut;if(s){c.show();u=0}w.retainPath=false;w.onBeforeHide.call(c);c.stop(true,true).animate(w.animationOut,u,function(){var x=b(this);w.onHide.call(x)})}return this},show:function(){var t=o(this);if(!t){return this}var s=this.addClass(t.hoverClass),c=s.children("ul");t.onBeforeShow.call(c);c.stop(true,true).animate(t.animation,t.speed,function(){t.onShow.call(c)});return this},destroy:function(){return this.each(function(){var s=b(this),t=s.data("sf-options"),c=s.find("li:has(ul)");if(!t){return false}clearTimeout(t.sfTimer);m(s,t);n(c);g(s);s.off(".superfish").off(".hoverIntent");c.children("ul").attr("style",function(u,v){return v.replace(/display[^;]+;?/g,"")});t.$path.removeClass(t.hoverClass+" "+p.bcClass).addClass(t.pathClass);s.find("."+t.hoverClass).removeClass(t.hoverClass);t.onDestroy.call(s);s.removeData("sf-options")})},init:function(c){return this.each(function(){var t=b(this);if(t.data("sf-options")){return false}var u=b.extend({},b.fn.superfish.defaults,c),s=t.find("li:has(ul)");u.$path=r(t,u);t.data("sf-options",u);m(t,u);n(s);g(t);j(t,u);s.not("."+p.bcClass).superfish("hide",true);u.onInit.call(this)})}}})();b.fn.superfish=function(d,c){if(a[d]){return a[d].apply(this,Array.prototype.slice.call(arguments,1))}else{if(typeof d==="object"||!d){return a.init.apply(this,arguments)}else{return b.error("Method "+d+" does not exist on jQuery.fn.superfish")}}};b.fn.superfish.defaults={hoverClass:"sfHover",pathClass:"overrideThisToUse",pathLevels:1,delay:800,animation:{opacity:"show"},animationOut:{opacity:"hide"},speed:"normal",speedOut:"fast",cssArrows:true, disableHI:false,onInit:b.noop,onBeforeShow:b.noop, onShow:b.noop,onBeforeHide:b.noop,onHide:b.noop,onIdle:b.noop, onDestroy:b.noop};b.fn.extend({hideSuperfishUl:a.hide,showSuperfishUl:a.show})})(jQuery);
function menunav(b){b("#mobilenav").click(function(){b("#menunav").slideToggle();b(this).toggleClass("active");return false});b(".sf-menu ul").each(function(){var d=b(this).parent("li");d.append("<i></i>")});function a(){var d=b(window).width();if(d>979){b("#menunav").css("display","block");b("#menunav").superfish({animation:{height:"show"},animationOut:{height:"hide"}});b(".sf-menu i").css("display","none")}else{if(d<=979&&b("#mobilenav").attr("class")==="active"){b("#menunav").css("display","block");b("#menunav").superfish("destroy");b(".sf-menu i").css("display","block")}else{if(d<=979&&b("#mobilenav").attr("class")!=="active"){b("#menunav").css("display","none");b("#menunav").superfish("destroy");b(".sf-menu i").css("display","block")}}}}a();b(window).resize(a);b(".sf-menu i").click(function(){var d=b(this).parent("li");var e=d.children("ul");e.slideToggle();b(this).toggleClass("active");return false});var c=window.location.href;b("#menunav a").each(function(){if(this.href===c){var d=b(this).parents("li").children("a").addClass("current")}})};     
//]]>
</script>


  • Replace 6FC415 with your preferred color code so that the menu may match your blog color theme

5. Find <body> and just below it paste the following HTML code

<b:if cond='data:blog.isMobileRequest == &quot;true&quot;'>
<div id='navitions'>
        <div class='isi'>
          <nav class='navix' id='nav1'>
<div id='searchnya'>
               <form action='/search'>
           <input name='q' onblur='if (&apos;&apos; === this.value) {this.value = &apos;Search here…&apos;;}' onfocus='if (&apos;Search here…&apos; === this.value) {this.value = &apos;&apos;;}' type='text' value='Search here…'/>
                <button title='Search' type='submit'>
                  <i class='fa fa-search siy'/>
                </button>
              </form>
            </div>

            <a href='#' id='mobilenav'>
              Select Menu
            </a>
            <ul class='sf-menu' id='menunav'>
              <li>
                <a class='home' expr:href='data:blog.homepageUrl'>
                  Home
                </a>
              </li>

<li><a href='#'>LINK TEXT </a></li>
            
                   </ul>
           
            <script type='text/javascript'>
              //<![CDATA[
              menunav (jQuery);
              //]]>
            </script>
          </nav>
        </div>
      </div>
    </b:if>


  • Replace the # hash tag symbol with your Page URL
  • Replace LINK TEXT  with your Page Title
  • You can create sub-menus by following standard HTML 
  • You can keep on adding new tabs just above </ul>

6. Finally save your template and you are all done!


Creating Multi Level Drop Down List

You are all done with the major code work. Now you just need to create the list in HTML using standard method. Any tab or link in your menu will have this structure:

<li><a href="#">LINK TEXT</a> </li>

To add a drop down list to this tab all you need to do is to paste the following code just before the closing </li> tag. See below:

<li><a href="#">LINK TEXT</a>

<ul>
<li><a href="#">FIRST LIST 1</a></li>
<li><a href="#">FIRST LIST 2</a></li>
<li><a href="#">FIRST LIST 3</a></li>
</ul>

</li>

To add a second drop down list within this vertical list, simply use the same concept. I will add the second vertical list after the tab: "FIRST LIST 2"

<li><a href="#">LINK TEXT</a>

<ul>
<li><a href="#">FIRST LIST 1</a></li>
<li><a href="#">FIRST LIST 2</a>

<ul>
<li><a href="#">SECOND LIST 1</a></li>
<li><a href="#">SECOND LIST 2</a></li>
<li><a href="#">SECOND LIST 3</a></li>
</ul>

</li>
<li><a href="#">FIRST LIST 3</a></li>
</ul>

</li>


Rest follows the same pattern.

Hide your Desktop Menu From Loading in Mobile Devices

To make sure  redundant links may not appear once because of your Desktop menu (menu you are currently using) and second because of your Responsive menu, we will have to disable your Desktop menu on mobile devices.

Enclose your Desktop Menu's HTML code inside the following conditional expressions:

<b:if cond='data:blog.isMobileRequest == "false"'>

Your Desktop Menu

</b:if>

The above condition will show the Desktop menu only in Laptops and Desktop screens but will hide it in Smartphones and Tablets/ipads. To understand in detail what the condition above does, please read part#3 of this tutorial series.

Credits

The menu uses the Superfish Plugin V 1.7.2 created by Joel Brich as the backbone for its front-end dynamic effects. Superfish is a jQuery plugin that adds usability enhancements to multi-level drop-down menus. Due to this plugin our menu now fully supports touch devices and keyboard interaction.

The design and customization to the scripts are contributed by STCnetwork. Kindly attach due credits back to this page if you wish to share this menu with your readers.

Need Help?

If you have any questions that you wish to ask then please do not hesitate to post them below. I hope the menu above may change the overall UI experience of your beautiful blogger blog for your mobile visitors.

The tutorial series above have been really popular this month and I would like to thank you all for finding it so useful. I am trying my best to complete it as soon as time allows. Wish you all a safe and happy blogging journey, Peace and blessings buddies! =)

Read More